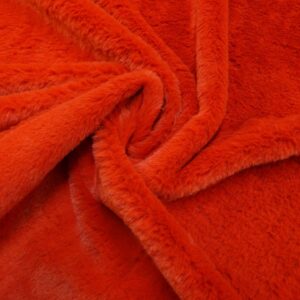
Faux fur is luxurious, cozy, and perfect for adding a touch of glamour to coats, costumes, and home furnishings. However, if you have never worked with it before, the thought of cutting into that beautiful, fluffy pile can be incredibly intimidating!
Will it shed everywhere? Will it jam your sewing machine? Don’t panic. Sewing with faux fur is actually incredibly easy once you know a few industry secrets.
Here is the Fabric Land guide to cutting, sewing, and finishing faux fur like a pro.
Essential Tools for Faux Fur
Before you start, make sure you have the right tools. Put your standard fabric scissors away for a moment!
-
A Craft Knife or Scalpel: (This is your secret weapon!)
-
Sewing Clips (like Wonder Clips): Pins tend to get lost in the thick fur.
-
A Heavy Duty Needle: Size 90/14 or 100/16.
-
A Comb or Knitting Needle: For the finishing touches.
-
A Vacuum Cleaner: Trust us, you will need it!
Step 1: The Golden Rule of Cutting Faux Fur
The biggest mistake beginners make is cutting faux fur with scissors right through the front. This chops the tips off the fur pile, leaving you with a blunt, unnatural-looking edge and a snowstorm of loose fluff.
How to do it correctly:
-
Turn the fabric over so the woven backing is facing you.
-
Draw your pattern pieces directly onto the backing (remembering to check the “nap” or direction of the fur—you want the fur running downwards!).
-
Take your craft knife and gently score only the woven backing. Do not push the blade all the way through the fur.
-
Once the backing is cut, simply pull the two pieces apart. The fur will separate naturally without losing its fluffy tips.
Step 2: Pinning and Prepping
Because faux fur is thick, standard sewing pins will vanish into the pile, making them hard to find and dangerous for your sewing machine needle. Instead, use strong sewing clips to hold your pieces together.
Before you clip your seams, use your fingers to brush all the fur fibres inwards, away from the raw edge. You want to trap as little fur in the actual seam line as possible.
Step 3: Sewing Machine Settings
You do not need a fancy industrial machine to sew faux fur, but you do need to make a few quick adjustments to your standard settings:
-
Increase your stitch length: Set your stitch length to about 3.0mm or 3.5mm. The extra bulk requires a longer stitch so the fabric feeds through smoothly.
-
Use a Heavy-Duty Needle: Faux fur backing is tough. Use a size 90/14 or 100/16 needle to prevent snapping.
-
Use a Walking Foot (Optional but helpful): If your machine has a walking foot, attach it! It helps feed the thick top and bottom layers evenly.
Top Tip: Sew in the direction of the fur pile whenever possible to keep the fur laying flat.
Step 4: The Magic Finishing Touch (Picking the Seams)
Once you have sewn your seam, turn the fabric right-side out. You will notice that the seam looks indented, with fur trapped in the stitching.
Take a blunt knitting needle, a pin, or a wide-tooth comb, and gently tease the trapped fur hairs out of the seam. Once you comb it over, the seam will completely disappear into the fluff, giving you a flawless, professional finish!
⚠️ One Final Warning: NEVER Iron Faux Fur!
Faux fur is made from synthetic fibres (plastic). If you touch an iron to it, it will melt instantly, ruining your fabric and your iron. If you need to flatten a seam, finger-press it or use a heavy book to press it down overnight.
Ready to Start Your Fluffy Project?
Now that you know the secrets, it’s time to get creative! Whether you are making a glamorous winter jacket, a cozy throw blanket, or a fun theatrical costume, we have the perfect materials for you.
Browse Fabric Land’s huge range of luxury Faux Fur by the metre here!